
How to remove whiteheads? That is a question I am often asked but I admit I kept postponing this article. A few days ago, my best friend asked me the very same question…. that was all I needed to finally write about it.
So, if you want to know how to get rid of whiteheads on nose or any other area, I hope this complete guide will explain you what to do to remove them quickly and safely. But first as always, you need to know a little about your skin enemy 🙂
What are whiteheads and how are they formed?
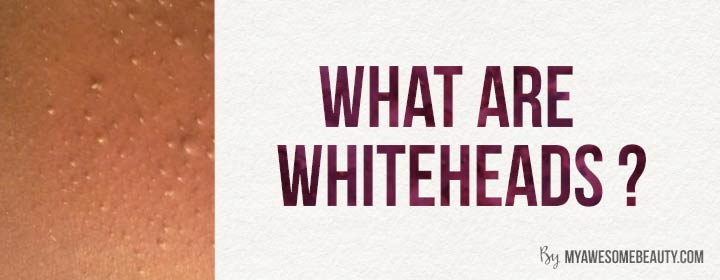
Whiteheads – these little buggers are actually one type of acne pimples that form when dead skin cells, oil, and bacteria become trapped inside a pore on your face.
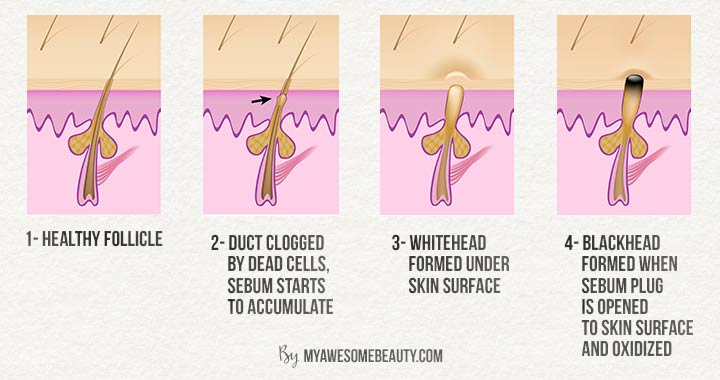
Imagine your pores to be tiny pockets underneath your skin. Inside it, you’ll find different structures including the root of your hair. Next to it are your sebaceous glands which secrete oil unto the growing hair – this is how a healthy pore is.
When dead skin cells, too much oil and bacteria accumulate and become trapped inside the pore, it produces a whitehead which, from the outside, looks like white tiny bumps on certain areas of the face.
So, in short, whiteheads are basically clogged pores or clogged hair follicles which can also be called comedone or comedo in plural form.
The Difference between a Whitehead and Blackhead

Is there a difference between a whitehead and a blackhead?
Yes, definitely. They are basically both clogged pores or comedo, but the main difference is in the skin opening.
A whitehead is considered as a closed comedone. It is not exposed to oxygen or to air. In the other hand, blackheads are the opposite because they are open. They appear black because the top part of the comedone is exposed to the air and is oxidized.
This explains its blackish or darker color. However, if you extract a blackhead, you will find that it is actually white or lighter underneath.
Why in the world do I have them?
Yes, they are pesky and unsightly. What’s worse is, because they’re just clogged pores, they’re not exclusive to your face alone. They can appear anywhere in your body like your back.
Great, right? Anyway, back to the face.
Interestingly enough, these tiny, white bumps will more likely appear on the oiliest areas of your face like your T-zone, chin and nose. This makes perfectly sense as this is where face oil will build up more quickly and easily.
Go check for yourself. Look into a mirror and check the areas mentioned. If you don’t have any on your T-zone, you’ll most likely have some on your chin and on your nose. Most girls will have more blackheads on their nose and a whole slew of whiteheads on their chin. If this sounds like you, check your chin closely by moving your lower lip inside your mouth, stretching the skin on the chin. If you see tiny bumps that seem to form a cluster, congratulations, those are your lovely whiteheads 🙂
How to get rid of whiteheads: the 8 rules

I know those whiteheads can be pretty annoying but the good news is that there are a number of ways to get rid of these white bumps! You will find in this guide our effective 7-day treatment that will help you ditch them for good. But first, let’s talk about the 8 rules to follow if you want to remove those pimples. How do you prevent whiteheads ? These rules will also kinda answer this question.
Rule 1: what you eat or drink shows on your face

I know, I know. When nutrition is involved, it usually means avoiding things we like to eat… and you would be damn right ha ha. Avoiding certain foods can definitely help prevent the formation of whiteheads.
You have the basics to avoid: alcohol, carbs, oily food and sugar. All of these cause changes in our body, which, not only helps produce whiteheads but can be bad for our overall health.
Here’s how the following foods affect our body processes:
- High sugar – too much sugar in the body causes an increase in insulin levels that, in turn, causes an increase in your hormone levels. The increased hormones activate the oil glands, making them produce more oil than necessary. This increases your chances of forming whiteheads because of the excessive oil.
- Carbs and alcohol – with carbs, it’s also the same as eating too much sugar. When ingested, our body actually breaks carbs down into sugar. It’s similar with alcohol too. Although, alcohol has also some added side effects on the body’s hormone production and immune system.
- Highly saturated and processed fats – ingesting too many foods that contain highly saturated fats can increase the arachidonic acid levels in our body. This kind of acid competes with the healthy omega-3 fats we have and causes more inflammation and acne.
Obviously, if you’re a normal person like me, I mean someone who likes to eat more or less everything too sweet or too oily (think of delicious ice creams or tasty crips or… ok you get the picture….), don’t freak out. You simply need to know you still can eat those yummy foods but moderately.
Or, you can also help yourself to some of the hormone balancing food on this list:
- Salmon
- Ginger
- Green tea
- Nuts
- Blackberries
- Green leafy vegetables
- Eggs
- Whole grains
- Lean protein
- Other antioxidant-rich fruits and vegetables
TIP: Here is a nice tip for you if you’re a fan of smoothies. Add a teaspoon of flax seed into a high-protein smoothie. It’ll help reduce whitehead and other acne inflammation. Another tip that you shouldn’t forget is drinking water. Drink at least 8 cups of water everyday because this balances out the processes in your body. It’s also a great way to hydrate your skin.
Rule 2: what does your finger, your pillowcase and your hair have in common?
They all can affect your skin.
Change your pillowcase regularly – if you can’t remember the last time that you changed your sheets, not just your pillowcase, it’s time that you change them! With pillowcases, your face basically comes in contact to it every time you sleep. If it’s been a while since you’ve changed your pillowcase, it’s highly likely that a lot of oil has already transferred from your face to your pillowcase. Do you still want to sleep on your unchanged pillowcase?
Tie up greasy hair – ok so this one is obviously similar to how the pillowcase works. If you have an oily scalp, your hair will also be oily. If your oily hair comes in contact with your oily face, well you do the math. Tie it up or do whatever is needed to keep your hair away from your face.
Avoid touching your face with dirty fingers – dirty fingers also contribute to skin irritation and inflammation. If you must touch your face, for whatever reason, make sure that you wash your hands first. And, just because your hands and fingers look clean, it doesn’t mean that they are clean. Remember that dirt can also get trapped under your fingernails so it’s really important to wash your hands even though they don’t appear dirty. (Just to make myself clear, I did not recommend you to go overboard and wear medical gloves before touching your face haha)
Rule 3: Exfoliate to set them free

If you wonder how to get rid of whiteheads under the skin, remember what whiteheads are: clogged pores with a build up of face oil, and bacteria.
One of the best ways to get rid of them is to exfoliate your skin in order to be able to reach them below the skin. This exfoliation will help get rid of dead skin cells, leaving your face soft and smooth. It’s also great for loosening up debris and grime that got stuck in your pores.
If you have normal skin, once or twice a week should be enough, but if you have oily skin and very thick skin, you can do it more frequently.
Regular exfoliation will definitely lessen your chances of getting new whiteheads and blackheads.
When it comes to whiteheads, I usually like to use facial scrubs. These are usually a cream based products that contain exfoliating particles that lift and remove dead skin cells when your massage the scrub all over your face.
Note that I usually stick to natural products in general, but when it comes to facial scrubs, I would recommend you to stay away from scrubs with ingredients such as apricot kernels or natural shells. They have very sharp edges that are usually too irritant for sensitive or acne prone skin. Instead, go with formulas that contain round jojoba beads, polyethylene grains or even aluminium oxyde used in microdermabrasion. These grains are perfectly round and very small so when massaging the scrub; they simply roll and won’t damage your skin. 🙂
This is what we call physical exfoliation. Chemical exfoliation such as peels can also take off the top layer of skin but I find them less effective than facial scrubs for this specific situation.
If you need a stronger exfoliation, you could also consider using a home-based microdermabrasion machine, which would be more cost effective in the long run.Check our complete guide here.
Rule 4: Know which ingredient is vital and which ones are optional

When you try to find a product to get rid of whiteheads, you will often hear about those 3 ingredients: salicylic acid, benzoyl peroxide and glycolic acid.
- Salicylic acid – salicylic acid helps to correct the abnormal shedding of cells. It also unclogs pores and prevents lesions. It is what we call a BHA (beta hydroxy acid) that also has anti-inflammatory effect, which can help to reduce any inflammation.
- Benzoyl peroxide – this works by destroying the bacteria that causes acne in general. This means that it can work with pimples, blackheads and whitehead. However, when you stop using it, the acne has the tendency to come back.
- Glycolic acid – glycolic acid is an AHA (alpha hydroxy acid) that’s derived from natural sources. It works similarly with salicylic acid in the way that it sheds dead skin cells off. By doing this, it helps balance out the skin’s PH and unclogs pores.
But these 3 ingredients definitely don’t have the same effectiveness.
In a nutshell, you should only stick to one ingredient among those 3. (This rule would not apply of course if you suffered from severe acne).
If you want to use the most effective active ingredient to fight whiteheads, we recommend you to pick salicylic acid.
Why?
Benzoyl peroxyde is a bit too harsh for whiteheads, it is much more useful for severe acne. Salicylic acid is liposoluble, meaning it is soluble in oil such as face oil, which is perfect as whiteheads are clogged pores with too much face oil trapped. Salicylic acid can penetrate into the pore whereas glycolic acid or any AHA in general cannot. So salicylic acid can exfoliate the surface of the skin and also inside the pore, which makes it much more effective for treating clogged pores and breakouts.
So if you buy a product for whiteheads, make sure it contains salicylic acid first. Glycolic acid and peroxyde benzoyl can also help but they are optional.
Rule 5 : Control your oil production

Whiteheads have more chances to appear when there is too much sebum (skin oil) so you need to use anything that could help you regulate or control your face oil production. One of the best tools to do so is the use of facial masks.
I really love them.
Facial masks are great for detoxing the face.
Because they need to sit on the face for a couple of minutes, whatever nutrient there is on the mask gets absorbed by the face in volumes.
Some masks also help control the excess production of sebum, which is exactly what you want to keep whiteheads at bay.
There are thousands of masks out there, which all claim to be the best in their category. I probably tested all of them and so far for oil control, I still come back to one facial mask which is really effective and super cost effective. This is this brand here on Amazon.
Yep, you won’t need to spend a fortune, as is the case with those high end products with fancy packaging and costly famous ambassadors. This facial mask will give you glowing and healthy skin, which is why I recommend it in my 7-day routine to ditch the whiteheads down below.
Rule 6: Avoid comedogenic products
This rule is pretty easy to understand. After using facial masks to regulate your sebum production, you want to make sure you don’t use too heavy creams on your oily skin.
Heavy or rich creams are fantastic for dry skin, but if you use creams that are thick, heavy in your case, it’s going to clog your pores and encourage the formation of blackheads and whiteheads.
In other words, you need to avoid comedogenic products: products that can clog pores.
You might want to go with serums, hydrating gels or lotions instead of creams if you have oily skin because they are much lighter and your skin can absorb them quicker.
This is important but don’t freak out if you use richer creams. Your skin is living tissue, which might need more moisture from time to time so this rule is not set in stone.
Whatever you use, in fact it is fine as long as you clean your face properly and regularly twice a day…. let’s be honest here. We sometimes would skip this step at night… that is why our skin is not as flawless as it should be 😉
Rule 7 : smart face cleansing and how to save money
This is by far the most important rule to remove whiteheads because daily cleansing will remove makeup, dirt, impurities, excess oil, dead skin cells and as result will prevent whiteheads.
When I say daily cleansing, I mean morning and night cleansing. You may wonder why it is important to cleanse your skin in the morning as well.
Well, a morning cleanse not only helps to remove any toxins the skin eliminated during the night but it also removes the oil excess secreted by your skin glands during the night.
When it comes to choosing your cleanser, I know a lot of you would choose a cleanser with the active ingredients we mentionned earlier (salicylic acid, glycolic acid, etc…) . Well I do think it is money down the drain. The cleanser won’t stay in contact with your skin long enough to be really effective. This is a product that will simply be washed away. So adding those active ingredients in a cleanser is a bit useless in my opinion.
This is far more important to have those ingredients in a serum or a toner to get results.
So, don’t buy a super expensive cleanser, it is not necessary. In our 7-day routine, I only recommend simple cleansers that will perfectly do the job without costing you a fortune.
Is a toner really necessary? YES if you want to prevent whiteheads, blackheads and acne. Most people think it is unnecessary but what a toner does is to return the skin’s pH back to normal (which is very important to avoid breakouts), it also completes the cleansing process because it removes the last traces of cleanser residue.
And the icing on the cake? It also helps shrink down pores 🙂 (bye bye big pores haha)
Rule 8: Increase your skin blood supply
Yeah, you guessed it: it is exercise 🙂
You’re probably thinking that exercise is only for your body, in general. It’s true, but it also has a couple of benefits for your skin.
First, sweating helps eliminate the toxins, which would otherwise clog your pores causing whiteheads and pimples. Needless to say that it is important to shower right after your workout to get rid of the toxins and dead skin cells.
Second, during your exercise, your skin will get more oxygen-rich blood which explains that flushed skin you get after a workout. This blood flow also brings nutrients to your skin. So as a result, you get healthier skin 🙂
Ok you might ask: what if I don’t have time or I don’t want to work out? I would answer you that I would still strongly recommend you to work out to get healthier in general but if you are short on time, I have a simple solution that will give you similar results…
How to get rid of whiteheads on chin? nose? forehead?
You are lucky. The same treatment applies to these different zones. Most whiteheads or blackheads appear in these areas because those are the oiliest parts of your face, this is what we call the T zone :)So every treatment or solution you will find in this article will target any whiteheads in those areas.
Moreover, some pores are deeper than others so whether you want to know how to get rid of deep whiteheads or more superficial ones, here again the treatment to use is the same.
Ok. enough with theory, let’s get started. Check the 7-day routine right below 🙂
How to remove whiteheads with our effective 7-Day Treatment
You will find here a step by step guide that will show you how to get rid of whiteheads without popping them. This is what I used it to get rid of mine. This treatment routine will do wonders if you follow the steps during these 7 days. This is a safe treatment that should definitely improve your skin day after day and put you on track to flawless skin.
Day 1 and 4
This is the routine to follow for the first day and the 4th day. We will call it the routine A
Morning
- Face cleansing to remove toxins, excess oil from the night, ( I used this product you can find on Amazon for this routine). It is a natural cleanser that I love because it is very mild and makes sure your skin is perfectly clean and refreshed. Of course, you can use your regular cleanser as long as it is not too drying.
- Toner to tighten the pores 🙂 I love using witch hazel as a toner. My favorite brand is this one through Amazon. Check also our guide about the uses of witch hazel on face here . (Make sure to pick the one without alcohol as it is too drying in the long run)
- Face lotion/ cream: I used this great face moisturiser I bought on Amazon with salicylic acid to fight whiteheads and pimples.
Night (before sleeping)
- Face cleansing to remove make up or dirt, I used the same cleanser ( on Amazon) as for the morning cleansing for this routine. Right after cleansing your face, the second step is steaming. This is very important to cleanse before steaming because you want to remove the oil excess and all the dirt from the surface of your skin so that they won’t penetrate into your pores once they are “open” with the heat.
- Steaming to open the pores, soften the skin and help with the third step (exfoliation) as the dead skin cells can be removed more easily right afterwards.You can either simply pour some hot water in a bowl, lean over it so that your face is right over the steaming water, place a tower over your head so that it kinda creates a sort of tent or you can buy one of those super handy face sauna machines such as these here, which is so convenient and effective that I use it every week to help melt the sebum stuck in my pores.It works so great!! With the steam, my pores literally open up and let the sebum out. It is, like my sebum is running out of my face pores haha. The heat also helps promote a healthy blood flow. ( I told you there was an alternative to exercise 🙂 ) So, close your eyes, breathe deeply. Keep your face over the steam for about 8 to 12 minutes and let the heat slowly open your pores.
- Exfoliating. Steaming before exfoliation makes the whole process of exfoliation and removing your dead skin cells so much easier. So, right after the steaming, now it is time to exfoliate. I prefer physical exfoliation to chemical exfoliation after a face sauna as I find this combination much more effective. So, use a face scrub to exfoliate, which will help to get rid of deep whiteheads stuck under your skin. I used this product here bought on Amazon for this routine. It is a very effective scrub with jojoba beads (round without sharp edges for a safe exfoliation). If you need a stronger scrub, you can use a microdermabrasion home machine, it will be also more cost effective in the long run as you buy the machine once, that you can use as often as you like.(our at home microdermabrasion device comparison guide here)
- Toner to close the pores and make them look smaller 🙂 I used again witch hazel as a toner. (Same as the one in the morning)
- Serum with salicylic acid. This will help unclog the closed pores that are tougher than the others…. I use this serum from Amazon, which has 2% of salicylic acid and many other good ingredients that will boost your skin. I find it as effective but way cheaper than this famous serum (on Amazon).
- Face lotion/ cream (optional): this step is optional because with oily skin, I usually find that a serum at night is enough but for those who need more moisture, you can use on top your favourite lotion or cream. Just make sure to wait at least 20-30 minutes between the application of the serum and the night lotion/cream. Or you can use the same moisturiser (on Amazon) we used in the morning. (don’t use too much though, you don’t want to have a greasy face. Just apply enough to moisturise your face 🙂
- Enjoy your night and have sweet dreams.
Day 2, 3, 5 and 6
For the following days except the 4th day, simply follow this routine that we call routine B. We won’t go into much detail as we already did for day 1.
Morning
- Face cleansing
- Witch hazel toner
- Face lotion / cream (with salicylic acid)
Night
- Face cleansing
- Witch hazel toner
- Serum with salicylic acid
- Face lotion / cream (optional)
Day 7
We call this the routine C.
For the last day of the week, we will use one of the best facial masks to regulate oil secretion and get rid of the remaining whiteheads. There are many expensive facial clay masks out there, don’t waste your money. The brand we use is easy to find on Amazon here. This product is cheap and super super effective. It is hands down the best one I came across so far.
Morning
- Face cleansing
- Toner with witch hazel
- Face lotion / cream (with salicylic acid)
Night
- Face cleansing
- Facial mask with clay
- Toner witch hazel
- Serum with salicylic acid
- Face lotion / cream (optional)
At night, right after cleansing your face, pat dry your face and apply your clay facial mask (you will have to prepare the mixture beforehand).
How to prepare your clay facial mask :
- Mix 2 tbsp of healing clay (via Amazon) with 1 tbsp of water and 1 tbsp of raw apple cider vinegar (use organic vinegar like this famous one on Amazon which is 100% natural and not made with apple juice concentrates ), you should use only water if you have sensitive skin to avoid redness but it is really more effective with vinegar).
- Make sure to use a non-metal bowl and spoon as metal could interfere with clay.
- Mix until you get a smooth paste. If it is too runny for you, add more clay powder, if is too thick for you, add more vinegar or water.
- Apply a thick layer to your face or other area if necessary.
- Let it sit and dry for about 10 – 20 min. The mask will tighten; it is normal.
- Remove it by washing with warm water.
- You might experience some slight redness of the skin; it is normal and will disappear in about 30 minutes.
- You can already see a huge improvement
- Now follow the other steps (the witch hazel toner, etc….)
What to do next after the 7 days ?
If you still have some whiteheads, depending on your oiliness and skin condition, you should follow the same routine another week. Some of us have much more whiteheads than others, so it takes them much more time to remove them. Be patient and consistent.
If you exterminated all your whiteheads, then the following weeks: it is more a maintenance phase, so only do the routine A once a week.
Example:
- Day 1, 2, 3: routine B
- Day 4: routine A
- Day 5,6: routine B
- Day 7: routine C
If you need more hydration, feel free to do some hydrating masks such as this one via Amazon every week. This is a korean brand that I really like. it is very hydrating and soothing. It is basically a mask sheet soaked with a nutrient rich mixture, that you apply on your face for 20 minutes. ( my tip is to put this mask in the fridge 1 hour before using it to get a nice cooling effect).
The immediate solutions to get rid of whiteheads on face
If you don’t want to follow the 7-day treatment, because you simply want to know how to get rid of whiteheads fast, as you are too short on time, or if you are on a hurry, then you might consider the following solutions for quicker results. With those methods, you can get rid of whiteheads overnight but keep in mind, whitehead removal is a battle in the long run…
- The whitehead extractor portable machine
- The manual whitehead removal tool
- The famous super korean pore strips in 3 steps
The whitehead extractor portable machine
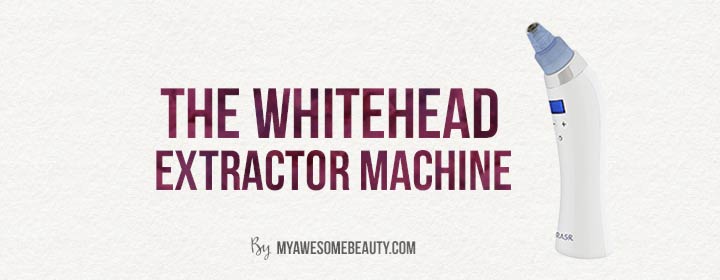
It is usually recommended not to extract your whiteheads yourself because you might irritate the pores and trigger more inflammation. That is is why it is wiser to get them professionally extracted. But I know most of you still prefer to do it yourself. (I cannot blame you because I sometimes do it myself too haha).
If you do, please don’t extract your whiteheads with your fingers because it’ll lead to irritation and scarring.
Instead, you could use a portable machine that kind of sucks all the junk stuck in your pores, namely your whiteheads and blackheads. It is in fact like a pore vacuum cleaner that sucks everything.
You can use it on your nose, chin and forehead. It works perfectly on all those areas.
If you want to use it under your eyes, I recommend to be careful and to use the lowest setting… and to build up from there, if you need more suction.
Note that if you try to use it on a dry face, it won’t work well. I recommend you to open up your pores by using a hot towel on your face for 15 – 20 minutes or by using a face sauna machine such as this one on Amazon , which will make the whole session much easier. That way, the pore cleaner will work wonderfully and be able to clean out everything.
We tested this machine here from Amazon. I admit I was a bit skeptical with this machine at first as there are a lot of those devices which simply have no suction power whatsoever or which just break down after a few uses…. This one is powerful and so far worked really great (and the price is pretty reasonable too)
Be careful not to stay too long on the same spot or you will end up with ugly marks and hickeys and remember to keep exfoliation your skin regularly so to be able to reach deeper whiteheads.
The manual whitehead removal tool
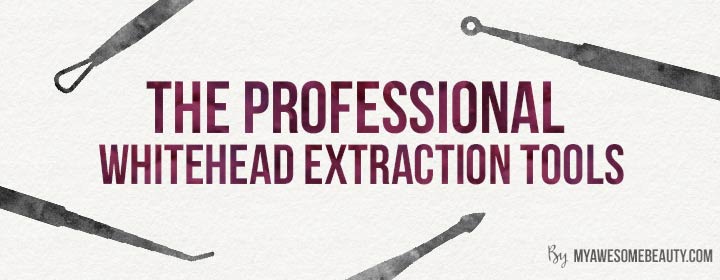
For those who still prefer the manual method, here is a specific whitehead removal tool to extract them so to minimize irritation and make the process easier and more hygienic.
The kit I like best so far is this one I bought on Amazon. It has 5 different extraction tools that have been well thought to remove safely whiteheads.
Each tool is made of solid stainless steel, which minimizes any sensitivity issues. They are solid, durable and the kit is cheap. No need to spend hundreds of dollars to buy expensive kits, this one is cost effective and does the job.
Note:
- Please remember to sterilize the tools with alcohol before and after use, to avoid any infection or irritation.
- Before extracting the whiteheads, you could use a face sauna machine to open up the pores, there are more expensive machines but this cheaper one on Amazon is more than perfect for this use. This is what I recommended for the 7-day treatment to make the extraction easier.
- After the extraction, use a toner to close the pore…(you can use witch hazel extract (great brand on Amazon) like me to close the pores and benefit from its antiaging, antioxydant properties or you can even apply ice on your face to close out your pores. I like to put my witch hazel extract bottle in the fridge to get better effects)
The super korean pore strips in 3 steps
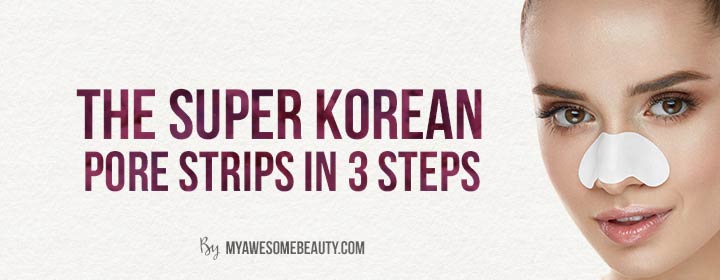
Another very popular quick fix is the use of pore strips.
Pore strips are effective with whiteheads and blackheads. I am not talking about the basic single pore strips that you probably know, but the 3-step pore strips (here on Amazon) which are super popular in Asia (I admit I went to south Korea recently and I found a lot of nice stuff there haha)
This is a set of 3 pore strips that you need to use in the right order.
The first strip helps to open the pores by chemically exfoliating your nose skin. The second strip is the real thing; it is the pore strip that will remove the whiteheads and blackheads. And the first strip will close the pores.
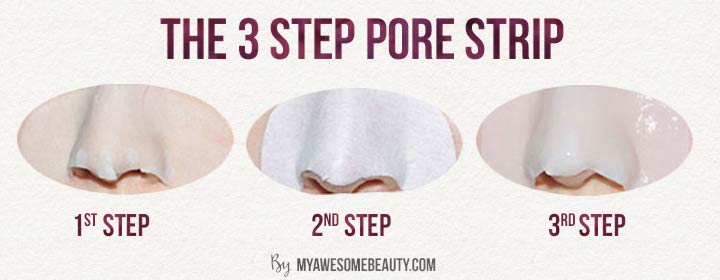
How to use it?
- Facial cleansing
- Put the first strip on your nose and let it sit for 20 minutes
- Remove it and use water to wipe off any residue
- While your nose is still wet with water, put the 2nd strip on your nose, make sure the strip sticks perfectly to your nose. Let it dry and become stiff. It should take about 15-20 minutes. (Wait longer if you live in humid countries)
- Remove it slowly from the bottom to the top, (don’t do it from the side, as it is less effective in pulling the whiteheads, so do it from the bottom to the top very slowly, this is the same logic as waxing, you want to remove as many hairs as possible, same thing here.) Check your strip, there should be lots of whiteheads or blackheads on it… (Gross ? I know… but you want it to be gross and remove your whiteheads haha )
- Place the 3rd strip, which feels like a jelly strip. It helps to close the pores 🙂 let it sit for 15 minutes and remove it.
- Voilà your are done 😉
- note: for those who wonder how to get rid of whiteheads on chin or how to get rid of whiteheads on forehead? Easy, you can use those trips too. I know it is mostly used for the nose, but I also use them on chin and forehead 🙂 it works !!
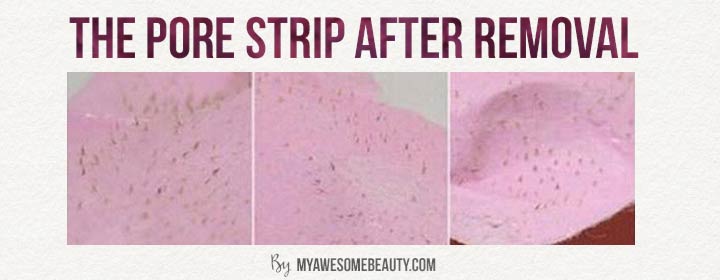
Tip: To get the most out of your pore strips, you can steam your face first in order to open up your pores before you apply the pore strip. You can use a sauna machine like this one on Amazon as we already mentioned earlier or simply, boil some water and then put it in a bowl. Place your face over the bowl to catch the steam. Do this for 3 mins and then apply your pore strip. (Just in case, remember cleanse your face first, do the steaming and then use the pore strips)
For those who have oily skin, you can use this pore strip twice a week. For normal skin types, you can use those pore strips once a week.
The home remedies to get rid of whiteheads on nose, chin…
If you want to know how to get rid of whiteheads under eyes, on nose or forehead… But still prefer to make your own home remedies, here are a few recipes for you to try.
The DIY Sticky Pore Strip
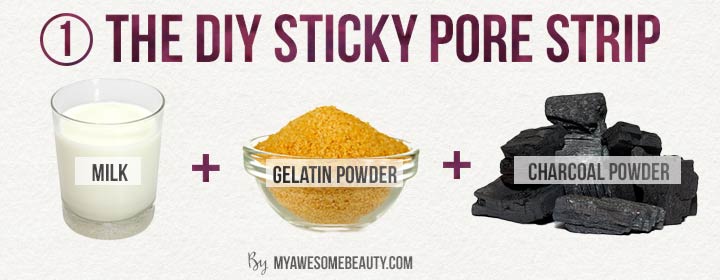
Here’s a quick DIY pore strip recipe you can do with milk and unflavored, plain gelatin.
You’ll need the following tools and ingredients:
- Small bowl
- Microwave
- A flat brush for application
- Spoon
- 2 tbsp of Milk
- 1 tsp of charcoal powder (we used this one from Amazon, charcoal is really useful, I use it mostly in case of food poisoning or diarrhea ( yeah I know it is not super sexy haha)
- 1 tbsp unflavored gelatin bought on Amazon
Instructions:
- Mix the milk and the charcoal in a bowl
- Pour the unflavored gelatin in the same bowl.
- Let it sit for 5 minutes
- In order to make it liquid, heat it up in the microwave. Set the heat on minimal.
- The mixture is going to be liquid and hot,
- Let it cool down
- Take your flat brush, dip it into the mixture and brush it over the areas in your face where you have whiteheads and blackheads.
- Let it dry (about 10-20 minutes) and then take the strip off.
With this DIY pore strip, you have to remember that it won’t be as effective as professional extraction or the korean 3-step pore we talked about above but it can certainly help.
The Pore Unclogging Toner
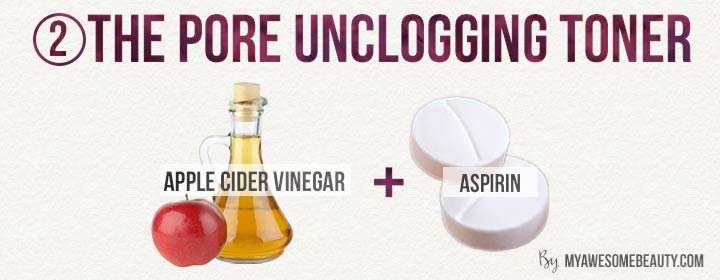
Ok, this is an exfoliating toner that can help slough the dead skin off with the salicylic acid (BHA) from the aspirin and the malic acid (AHA) from the vinegar! This will help unclog your pores and remove your whiteheads under the skin .
What you need:
- 3 tbsp or organic apple cider vinegar (we used this one via Amazon, make sure to use an organic one)
- 2 uncoated aspirin
- 200 ml of water
- 1 glass bottle
Instructions:
- Take your aspirin and crush them with a spoon.
- Pour the water in a bowl
- Put your crushed aspirin tablets in the bowl to dissolve it
- Add the 3 tbsp of organic apple cider vinegar
- Stir to get your ready-to-use toner
- Keep in your glass bottle 🙂
- Apply it using a cotton ball and let it sit on your face for 20 minutes.
- Apply your moisturizer
Note: you can use this homemade toner day and night 🙂
The Antibacterial Coco-Honey Scrub
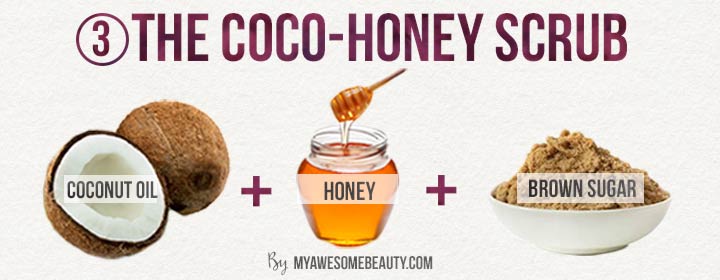
This is a nice scrub to use regularly to exfoliate and get rid of the dirt trapped in your pores.
Did you know that coconut oil has moisturizing and anti-bacterial agent properties?
Honey, on the other hand, also has antibacterial properties and skin nourishing properties. If you combine these two, you’ll get a potent anti-bacterial scrub that’s also nourishing and moisturizing.
Oh, let’s not forget the sugar, which is our exfoliating agent in this recipe
What you’ll need:
- 2 Tbsp of honey
- 2 Tsp of coconut oil
- Brown Sugar (you can estimate how much you need) (I like to use 3 tsp)
Procedure:
- Wash your face first and then pat it dry.
- Mix the coconut oil and the honey together in a small bowl.
- Add in your sugar (remember that you can increase or decrease amount depending on your preferences). All three need to be mixed well.
- In small amounts, apply the scrub to your face and then massage it gently.
- You can leave it on for 10-15 mins.
- Rinse off the scrub completely with warm water and pat your face dry.
The scrub is going to be very sticky because of the honey so make sure you have your paper towels nearby. If you don’t like the big mess, you can also do a bit of spot correcting. Spot correcting is applying a remedy only on the affected areas and not on the entire face. To spot correct, apply the scrub on the parts that have the whiteheads, blackheads and pimples. Massage or scrub the area well. Let the scrub sit for 10-15mins and then rinse.
The Hydrating Sugar Scrub
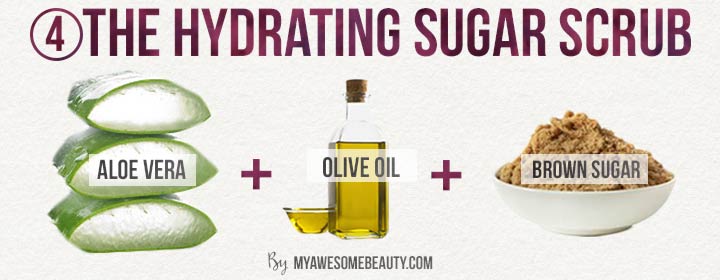
Sugar, when used as an exfoliant, helps get rid of dead skin cells clogging up your pores. If you mix it with aloe vera, olive oil, you’ll have yourself an instant hydrating and moisturising sweet scrub. You’ll most likely find all of the ingredients mentioned in your kitchen so it’ll be quick and easy to make.
Aloe vera is very hydrating with soothing properties that are very useful in case of burns or redness. (My boyfriend loves it haha)
What you’ll need:
- ½ cup Brown sugar
- 2-3 Tbsp of aloe vera gel (our favorite brand easy to find on Amazon )
- ½ Cup Extra virgin olive oil
What to do:
- Mix ½ cup of virgin oil and ½ cup of brown sugar.
- Add in your aloe vera gel
- Mix well with a spoon.
- Use once a week when you have normal skin and then twice a week if you have oily skin.
The whitehead remover Mask
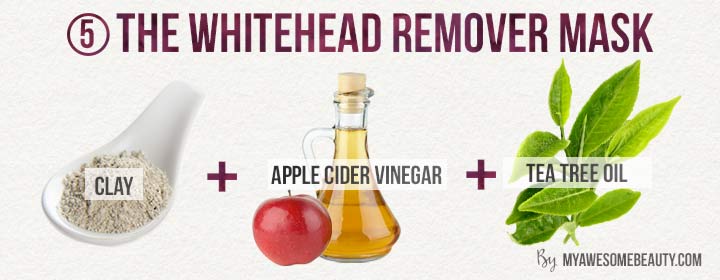
We already mentionned the use of bentonite clay to deep pore cleanse but in this recipe we will add some essential oils to boost its effects.
Bentonite clay is mineral-rich healing clay that has been used to treat different skin conditions over the centuries. Its molecules are “electrically charged” when wet, doing an amazing job of drawing out oils and other impurities locked in your pores.
We will add some tea tree oil in this mask to boost the efficacy of the mask. Tea tree oil is well known for its intense purifying and antibacterial properties. I also use it on my pimples. I apply some on my pimples and the pimples are usually gone overnight. It is a must have.
What you’ll need:
- 4 Tbsp of bentonite clay ( via Amazon)
- 2 tbsp of apple cider vinegar via Amazon
- 2 tbsp of water
- 1 drop of tea tree oil ( via Amazon)
Instructions :
- All you have to do is mix the clay with the water and vinegar
- Add the tea tree oil
- You will get a paste that is thick but still applicable (I like it when it is thick)
- Apply a thin layer of the paste on your face.
- Let it sit for 10 to 25 mins or as soon as it dries up.
- Rinse off with lukewarm water and moisturize as usual
Those 5 recipes are perfect for those who are more interested in how to get rid of whiteheads naturally but remember you need to be patient and exfoliate regularly to get results.
Some myths about whiteheads
Let’s explore some myths and truths about whiteheads and blackheads:
- Blackheads are not dirt! They have the same contents as whiteheads, but they’re just inside an open pore and the top part has undergone oxidation, which explains the black color.
- It’s ok to eat chocolate when you have acne or whiteheads . Most people would tell you that you need to avoid chocolate when your skin is acne prone. It’s actually half true. Chocolate that contain a higher concentration of sugar is a definite no-no, but dark chocolate that has more cocoa than sugar is ok to enjoy.
- The main cause of your whiteheads is your diet. Although diets can greatly contribute to acne production, they are not the main cause of acne. The main culprit is almost always your hormones.( which leads to more oil secretion)
- Do not wear makeup when you have whiteheads or acne. This is false because with all the products that have been released in the market, some products are well formulated and won’t clog your pores. So, it’s all right to wear makeup when you have whiteheads and blackheads and pimples. All you have to do is to remove the makeup thoroughly before sleeping.
- The stronger the product, the better. This one is false too because strong products tend to dry out the face and irritate your skin. If your acne is not that severe or if you don’t have many whiteheads, milder products should do the trick.
- Sun exposure can help with your acne or pimples. This is another false statement. Although sunlight can help with the inflammation, generally, it can do more harm than good because the sun tends to break down the collagen we have in our skin. Less collagen means that the skin might have difficulty in repairing itself making it more prone to scarring and acne formation.
So to the question on how to get rid of whiteheads on face ( nose, chin, forehead etc..) , we hope that this detailed guide helped you find some easy treatments to try in order to get rid of whiteheads fast. You can choose between our 7-day treatment or if you are more impatient, try one of those quick fixes, or our easy homemade remedies.
Whatever the remedy or solution you choose to remove your whiteheads, keep in mind that you need to be super consistent; this is really an ongoing battle that requires long term dedication and commitment. Mind you, this is how you will deserve your perfect and flawless skin:)
Further Reading you might like:

Leave a Reply